


You’ve completed the installation and arrived at your destination, but your eSIM doesn’t seem to be working? No worries! Let’s run five quick checks to ensure everything is set up correctly.
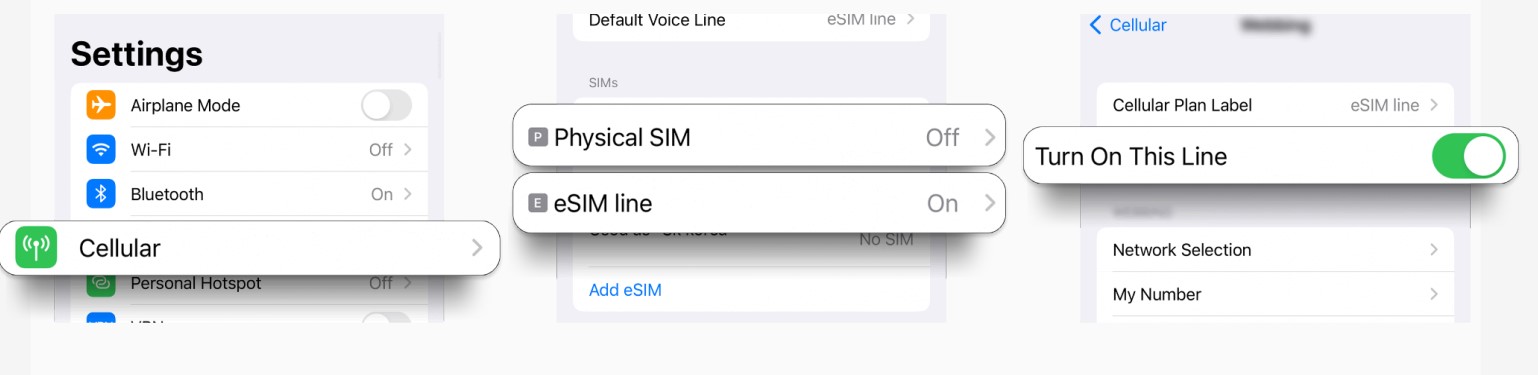
1 Enable the eSIM Line
Go to Settings > Cellular > Select your eSIM line > Enable This Line > Toggle it ON.
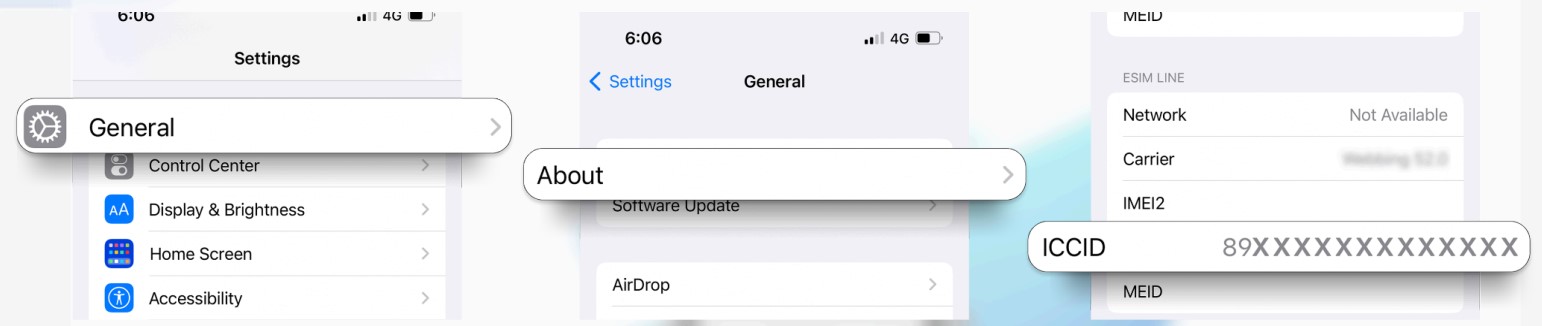
2 Check the ICCID of the eSIM installed on the device
Go to Settings > General > About > Scroll down. Ensure the ICCID on your device matches the one you received.
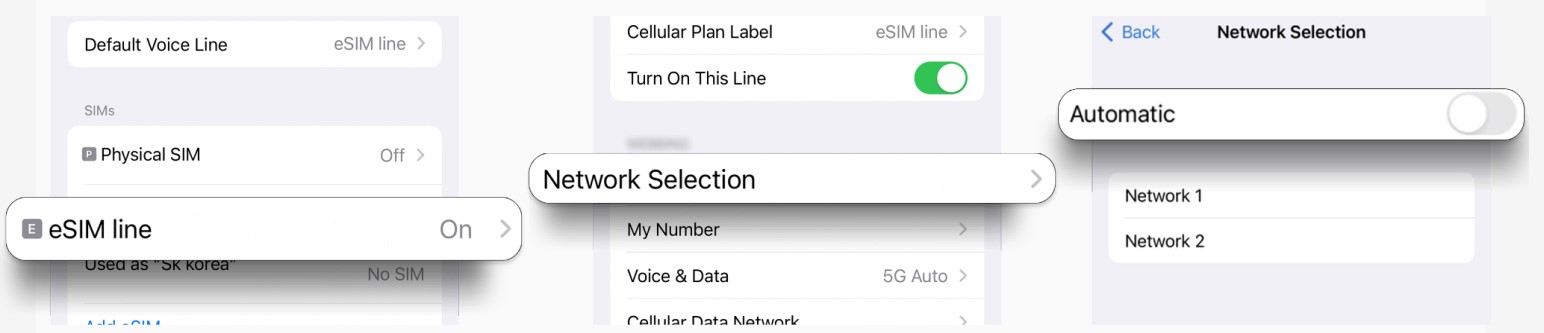
3 Check network settings
Go to Settings > Cellular > Select your eSIM line > Network Selection > Toggle “Automatic” OFF > Select your network.
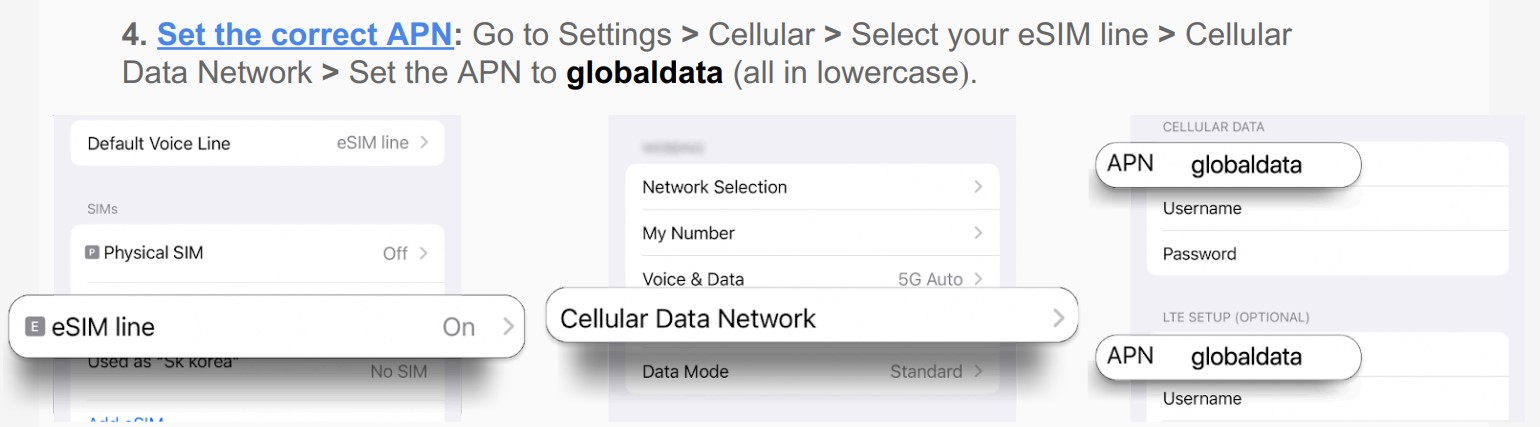
4 Set the correct APN
Go to Settings > Cellular > Select your eSIM line > Cellular Data Network > Set the APN to globaldata (all in lowercase).
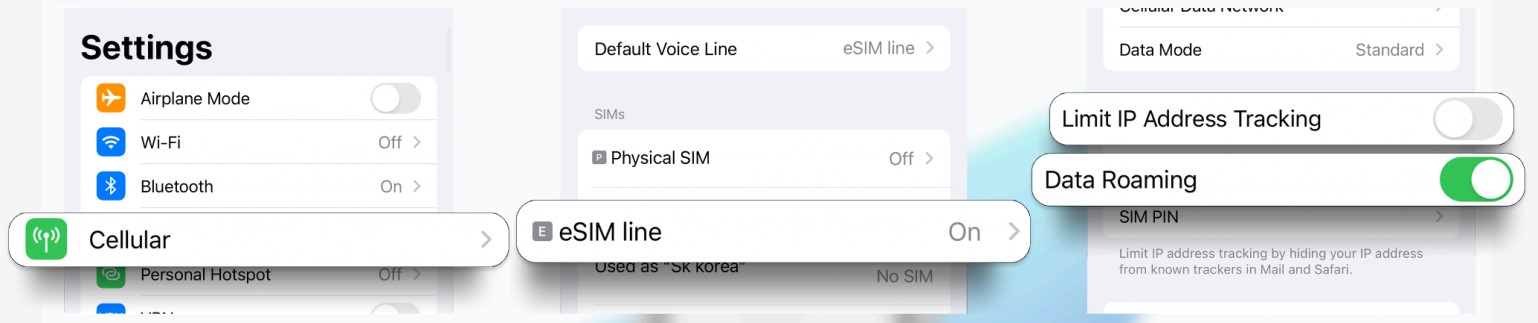
5 Turn on Data Roaming
Go to Settings > Cellular > Select your eSIM line > Data Roaming > Toggle ON.
Once this is done, restart your device to allow the network to be reconfigured.